 In class we had a lesson on how to use photoshop. We learnt the basics of creating layers and when you are doing something on a picture you should take into account what layer you are on. Here you can see that is highlighted on the background therefore whatever you are doing (for example if you change the brightness) it will only change the background layer.
We then learnt how you take something from one image and paste it onto another image. For this you use the lasso tool. If you hold down the Alt key and click where you want it to go then it can be selected specifically. Here you can see the area I have selected with the lasso tool because of the line that is black and white. Also you can see in the other picture where I have copied and pasted this image onto the same image. If you wish to change the size of the image but keep the proportions you press Ctrl T, then press the shift key whilst you are changing the size. You can also rotate the image at this size.
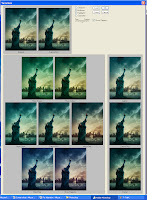
So here I have used the photoshop techniques on a photograph from the film Cloverfield. Here is the original.
 I also edited the halo man to make him fit into the picture a little bit better. I did this by using the lasso tool going around the outline of him, then copying and pasting him into the image. I then changed this size according to the image. I then edited the colours and the way I did this was by using these editing tools (right) as they can make the image fit into particular photographs. I then also changed the variations by going on Image/Adjustments/Variations. By clicking on the Variations tool it comes up with many options of how to change the colouring on your image. I think the options for this with the original image gave really good options for what you can do with the image colour. Some of them created very powerful images - at a click or two buttons. It can completely change an image (the mood, colours).
The clone stamp tool, which is found on the left hand side tool bar. Is used to get rid of an area and replacing it with another bit from the image (it's very much like retouching). In this image it had writing on it, but if you wanted to get rid of any of this you would use this stamp tool. The way you use it is by pressing Alt on the area you want the area you don't want to be replaced by. Then you press on the letter to get rid of it and what replaces it is the sea. It can be quite tricky to get perfect as you have to be careful of the shades and colours. Heres a picture of what the tool looks like when you are using it.
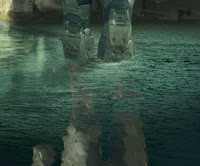
We then looked at reflections and how we could create shadows but in this case for this picture it was making a refection. The way you do this is by righ clicking on the layer and clicking duplicate layer. Make sure that the image stays the same size (Alt), then rotate it. You can edit the image using the scrolling editing (picture above starting with the word Normal). You can also go onto Adjustments and edit the contrast and brightness. There is also another editing tool which makes the image rippled as if it is in the water (which is brilliant for a reflection in water). Here below you can see the effect that the ripple had on the photo.

We then looked at text and how to edit text. You can do this by righ clicking on the text and going on effects. I embossed my writing, gave it a drop shadow, inner glow and outer glow. I think that this works with the image as the colours I have used blend it but also the shadows make it stand out and give the writing some texture.
If you wish to save your finished image, then you can flatten the image. By going onto layers, flatten image. However you would only do this if you are sure you do not want to go back and edit any of the layers as this wouldn’t be possible to do if you flatten the image.
Here is the final image which I am quite pleased with for a first attempt.


Invest in Ripple on eToro the World’s Best Social Trading Network.
ReplyDeleteJoin 1,000,000's who have already discovered smarter methods for investing in Ripple.
Learn from experienced eToro traders or copy their positions automatically.